
I have seen beautiful vacation rentals sit half-booked simply because the photos failed to create an emotional reaction. Meanwhile, smaller properties with better lighting, cleaner angles, and smarter staging consistently attracted more clicks and higher nightly rates.
That is the reality of modern short-term rentals in the United States. Guests make split-second decisions while scrolling through crowded search results, and your photos usually determine whether they stop or keep moving.
Strong listing photography is no longer just about showing rooms. It is about selling an experience before guests ever arrive. Bright kitchens feel more welcoming. Clean bedrooms feel more relaxing. Well-composed exterior shots create trust instantly.
Once I started approaching vacation rental photography like visual marketing instead of simple documentation, I noticed a major difference in listing performance. Better images increased engagement, improved booking quality, and helped properties feel more premium without changing the actual space itself.
This guide breaks down the exact strategies I use to create cleaner, brighter, and more professional-looking listing photos that help vacation rentals compete in crowded US markets.
Why Listing Photos Matter More Than Property Descriptions
Most guests notice your photos before they ever read your title or amenities. Your cover image acts like the storefront for your property. If the first image feels warm, bright, spacious, and inviting, people naturally want to explore further.
Professional-looking visuals help listings appear more trustworthy and valuable. Better imagery can also reduce guest hesitation because travelers feel more confident about what they are booking.
I have personally seen average listings outperform larger properties simply because the photos created a stronger emotional reaction.
Prepare the Property Before Taking Any Photos

One of the biggest mistakes hosts make is starting photography too early. Even the best camera settings cannot fix clutter, poor staging, or distracting details.
Deep Clean Every Space
Dust, fingerprints, wrinkled bedding, streaky mirrors, and visible clutter become much more noticeable in high-resolution images. Before photographing a property, I always prepare the home exactly as if guests were arriving that day.
Following a detailed real estate photography checklist also helps ensure every room looks clean, organized, and camera-ready before the shoot.
Kitchen counters should stay mostly clear. Beds should feel crisp and symmetrical. Bathrooms should look spotless and minimal.
Remove Distracting Items
Vacation rental photos perform best when rooms feel clean and open. I usually remove personal items, visible cords, excessive decorations, toiletries, trash cans, cleaning supplies, pet items, and small kitchen appliances.
For exterior photos, I also move vehicles, recycling bins, and delivery boxes completely out of sight.
Add Warm Lifestyle Touches
Minimalism helps, but empty spaces can feel cold online. Small details often create emotional warmth without making rooms look cluttered.
Fresh towels, coffee mugs, neatly folded blankets, flowers, or a staged breakfast setup can help guests imagine themselves enjoying the property.
Use Natural Light to Make Rooms Look Bigger
Lighting completely changes how a property feels online. Bright interiors consistently outperform dark spaces because they appear cleaner, larger, and more welcoming.
I usually shoot properties during mid-morning or late afternoon when sunlight feels softer and more balanced.
Open Every Blind and Curtain
Natural light instantly improves interior photography. Before shooting, I open every curtain, blind, and window treatment to maximize brightness and showcase outdoor views.
Turn On Every Interior Light
One important real estate photography trick many beginners overlook is turning on every overhead light, lamp, vanity light, and accent light before shooting.
Warm interior lighting helps rooms feel more inviting and premium.
Turn Off Ceiling Fans
Spinning fan blades create motion blur and distraction in listing photos. I always turn them off before photographing a room.
Essential Camera Settings That Improve Interior Photography
Most modern smartphones can produce excellent listing photos, but understanding a few technical settings makes a huge difference.
Use a Wide-Angle Lens Carefully
Wide-angle lenses help capture more of the room in a single frame. Ideally, your composition should show at least three walls to create natural room depth.
However, overly wide lenses can distort rooms and create unrealistic expectations. Balanced realism always performs better than exaggerated editing.
Keep the Camera Perfectly Level
Tilting the camera upward or downward causes crooked walls and distorted vertical lines. I always keep the camera completely level so the walls remain straight and professional-looking.
Shoot With Low ISO Settings
Lower ISO settings reduce film grain and help interiors appear cleaner and sharper. Bright, noise-free photos generally look far more professional online.
Use HDR Bracketing for Difficult Lighting
One of the most effective techniques in professional interior photography is HDR bracketing. This involves taking multiple exposures of the same scene and blending them together later.
HDR helps preserve window views while still keeping interior shadows bright and detailed.
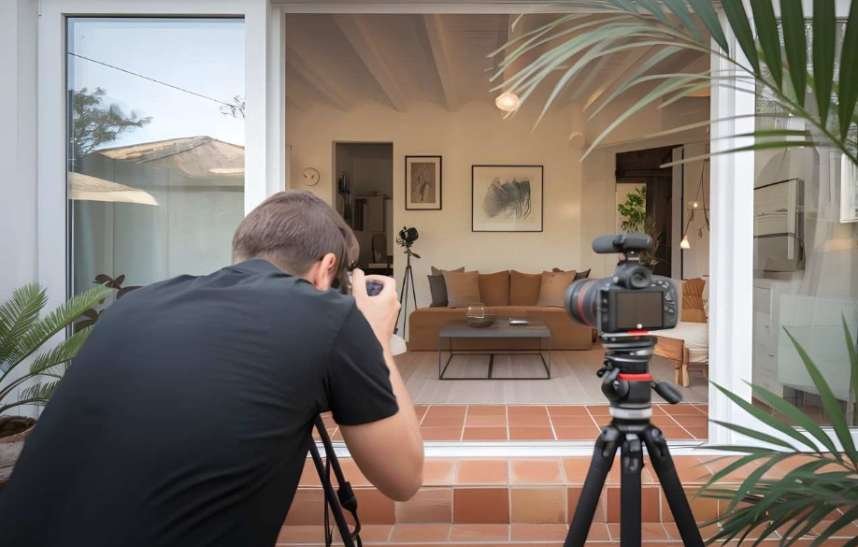
Why a Tripod Changes Everything
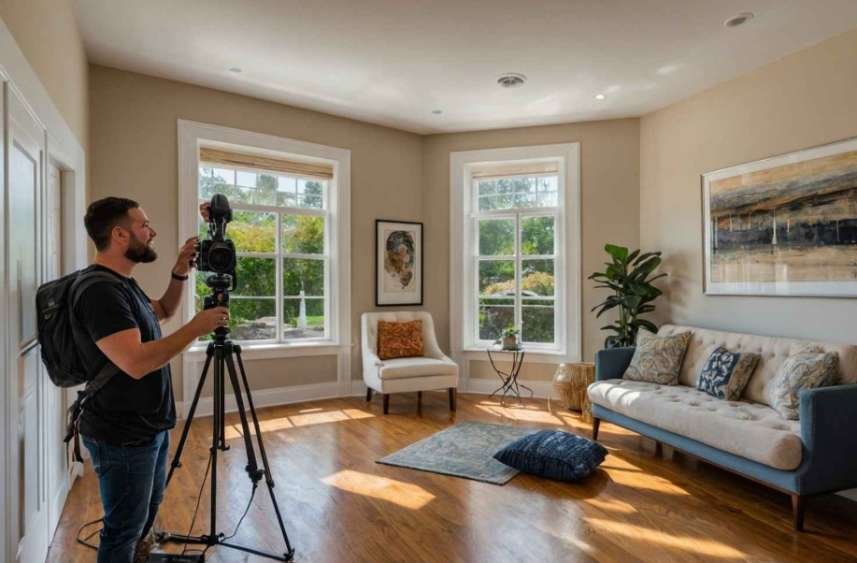
Tripods dramatically improve photo quality because they eliminate motion blur and inconsistent framing.
I usually position the tripod around chest height or near light-switch height, which creates a natural room perspective without making furniture feel distorted.
Using a tripod also allows slower shutter speeds without introducing blur, especially in lower-light rooms.
The Best Angles for Vacation Rental Photography
Composition determines whether rooms feel spacious or cramped online.
Shoot From Corners and Doorways
Standing near room corners or entry thresholds helps capture the maximum amount of visible square footage.
This technique works especially well for bedrooms, kitchens, and living rooms because it creates depth naturally.
Use Landscape Orientation Only
Most booking platforms display horizontal photos more effectively than vertical images. Landscape orientation also helps viewers understand room layouts more clearly.
Show How Rooms Connect
One thing many listings fail to do is explain property flow visually. I like varying my shooting angles so guests can understand how rooms relate to each other.
This makes the property feel more realistic and easier to visualize before arrival.
The Most Important Rooms to Photograph First
Some spaces influence booking decisions more than others.
I always prioritize:
- Front exterior
- Kitchen
- Living room
- Primary bedroom
- Bathrooms
- Outdoor spaces
- Amenities
- Scenic views
These images usually drive the strongest emotional response from guests.
Choosing the Right Cover Photo
Your first image influences whether guests even click your listing.
The strongest cover photos usually include:
- Bright natural lighting
- A visually attractive focal point
- Clean composition
- Warm emotional appeal
- Spacious perspective
Luxury listings often perform especially well with twilight exterior photography because warm lighting creates a premium feeling.
Many hosts also apply techniques from luxury real estate photography to create more polished and high-end vacation rental listings.
Editing Photos Without Making Them Fake

Editing matters, but over-editing damages trust.
I focus on realistic improvements instead of dramatic transformations. Proper exposure tuning, color balance, sharper details, brightness adjustments, and straight vertical lines usually create enough polish without making rooms look misleading.
Guests become frustrated when heavily edited listings look completely different in person.
How Many Photos Should You Upload?
I typically recommend uploading between 22 and 27 images for most listings.
Too few photos create uncertainty, while too many repetitive images can overwhelm viewers.
The goal is to tell a complete visual story without creating fatigue.
How Drone Photography and 3D Tours Increase Engagement
Modern real estate listings increasingly rely on immersive media.
Aerial Photography
Real estate Drone photography works especially well for:
- Waterfront homes
- Mountain properties
- Large backyards
- Luxury rentals
- Remote cabins
- Properties near attractions
Aerial images help guests understand location, neighborhood context, roof condition, and surrounding scenery.
Zillow 3D Home Tours
Some hosts now use 360-degree cameras and the Zillow 3D Home app to create interactive walkthrough experiences, especially when applying modern Zillow real estate photography tips designed to increase online engagement and improve listing visibility.
These tours can improve listing engagement because guests feel more confident exploring room layouts virtually.
Interactive Floor Plans
Digital floor plans paired with room photography help guests understand property layout much faster.
This is especially valuable for larger homes and multi-level vacation rentals.
Common Mistakes That Hurt Listing Performance
One of the most common mistakes I see is excessive editing. Unrealistic saturation, extreme HDR processing, and distorted wide-angle effects can make properties feel misleading.
Another major issue is inconsistent lighting. Mixed color temperatures between rooms make listings feel less polished.
Dark images, tilted walls, blurry shots, and cluttered counters also reduce trust immediately.
Frequently Asked Questions (FAQs)
1.What camera works best for vacation rental photography?
Many modern smartphones work surprisingly well, but mirrorless cameras and DSLR systems with wide-angle lenses usually produce the most professional results.
2.Do professional photos really increase bookings?
Yes. Strong visuals improve click-through rates, build trust, and help guests feel more confident about booking a property.
3.What are the best Airbnb photography tips for beginners?
The best Airbnb photography tips for beginners include using natural light, keeping rooms clean, shooting from corners, using a tripod, and avoiding over-editing.
4.Should I use HDR for interior photography?
HDR photography can dramatically improve interior images because it balances bright windows and darker shadows more naturally.
5.How often should listing photos be updated?
I recommend updating images whenever you renovate rooms, replace furniture, improve landscaping, or add new amenities.
The Final Frame
Creating high-performing listing images is not about making a property look fake or overly luxurious. It is about helping guests feel confident, excited, and emotionally connected before they ever arrive.
Once I started treating listing photography like visual storytelling instead of simple documentation, I noticed properties looked more premium, generated more engagement, and ultimately converted better.
The combination of clean staging, natural lighting, strong composition, realistic editing, and strategic room coverage can dramatically improve how travelers perceive your space online.


