
In real estate, buyers rarely see the property first. They see the photos first.
Before anyone schedules a showing, checks the floor plan, or reads the listing description, they are already judging the home based on how it looks online.
That is why high-quality real estate photography has become one of the strongest tools for attracting attention in competitive housing markets across the United States.
I’ve worked on listings where simple adjustments like cleaner staging, straighter vertical lines, softer lighting, and better composition completely changed how expensive the property felt online.
Even smaller homes can look premium when the photography feels bright, balanced, and professionally executed.
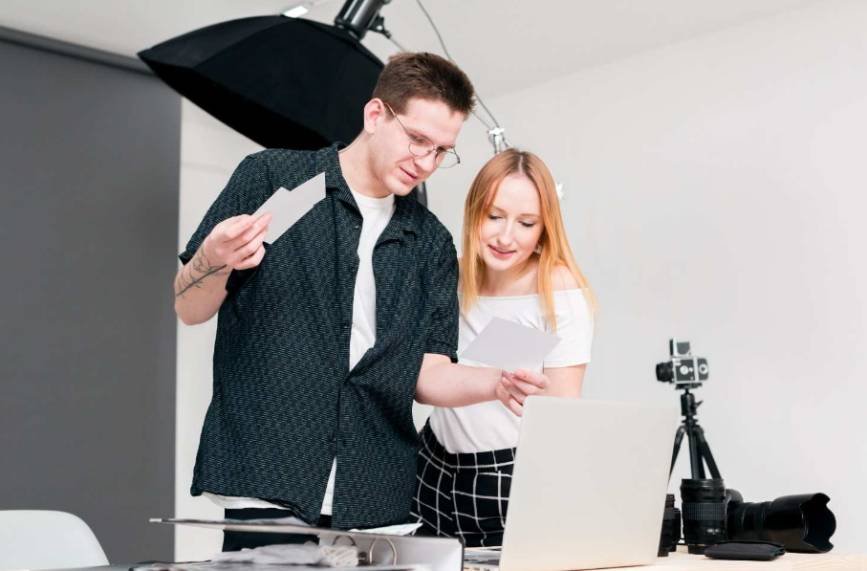
The biggest mistake many photographers make is focusing only on camera gear while ignoring workflow and presentation.
In reality, professional-looking listing photos come from understanding lighting control, proper exposure, room preparation, architectural composition, and realistic editing techniques that make spaces feel inviting without looking fake.
Once I started following a more structured shooting process, my images immediately became cleaner, sharper, and more consistent across every property style.
In this blog, I’ll break down the exact methods I use for staging, lighting, camera settings, HDR blending, composition, and editing to create listing photos that capture attention and help homes stand out online.
Why Professional Listing Photos Matter in Modern Real Estate
Most buyers now begin their property search online before ever contacting an agent. Because of that, the visual presentation of a listing directly impacts click-through rates, showing requests, and perceived property value.
Poor listing photos instantly create problems. Dark interiors, crooked walls, cluttered countertops, harsh shadows, and distorted wide-angle shots make properties feel smaller and less inviting.
Many photographers also study advanced luxury real estate photography techniques to create cleaner compositions, premium lighting balance, and more emotionally engaging property images.
Strong real estate photography tips focus on creating images that feel realistic while still emphasizing spaciousness, warmth, and architectural flow. Buyers want clean, natural photos that help them emotionally picture themselves inside the home.
That emotional connection matters more than many photographers realize.
The Camera Gear I Use for Professional Real Estate Photography

One of the biggest misconceptions in the industry is that professional real estate photography requires extremely expensive equipment. In reality, understanding lighting and composition usually matters more than owning flagship camera bodies.
A full-frame mirrorless camera performs best because it handles dynamic range more effectively inside high-contrast interiors. However, modern APS-C cameras can still produce outstanding listing images when paired with proper lenses and stabilization.
Best Wide-Angle Lens Settings for Interior Photography
Wide-angle lenses remain essential because they allow buyers to understand room layout and flow naturally.
I usually stay between 14mm and 17mm on full-frame cameras because this range captures entire spaces cleanly without introducing excessive fisheye distortion. Going wider than 14mm often causes walls and furniture proportions to appear unrealistic, which can create buyer disappointment during in-person showings.
Maintaining believable room proportions is one of the most overlooked professional techniques in property photography.
Why Tripods Matter More Than Camera Bodies
A sturdy tripod dramatically improves consistency and sharpness.
Interior real estate photography often requires slower shutter speeds ranging between 1/60 and 1/2 second depending on lighting conditions and HDR exposure brackets. Handheld shooting introduces blur very quickly during these longer exposures.
Tripods also help maintain level framing, which becomes critical when trying to keep vertical architectural lines perfectly straight.
The Camera Settings That Consistently Produce Better Listing Photos
After years of testing different workflows, I’ve found that consistency matters more than complicated settings.
Aperture Settings for Sharp Interior Images
I generally shoot around f/8 because it creates enough depth of field to keep entire rooms sharp without introducing softness from diffraction.
This balance works especially well for kitchens, living rooms, bedrooms, and open-concept interiors.
ISO Settings That Preserve Clean Detail
I always try to stay below ISO 400 and ideally remain around ISO 100 whenever possible.
Low ISO settings help eliminate digital noise in darker corners and preserve cleaner textures throughout walls, flooring, cabinetry, and furniture surfaces.
HDR Bracketing for Balanced Window Exposures
High dynamic range scenes are extremely common inside homes. Bright windows combined with darker interiors create exposure problems that single images often cannot handle properly.
I typically capture three to five exposure brackets separated by two stops each. This allows me to preserve clean details both inside darker corners and outside bright windows during editing.
When HDR blending is done correctly, the final image looks natural instead of overly processed.
The Composition Rules That Instantly Make Homes Look More Expensive
Composition completely changes how buyers perceive a room online.
One of the strongest real estate photography tips I learned early was that small alignment mistakes dramatically reduce image quality even when lighting looks good.
Keep Vertical Lines Perfectly Straight
Crooked walls immediately make listing photos look amateur.
I always keep the camera perfectly level and parallel to surrounding walls. This prevents vertical lines from slanting inward and keeps architectural proportions looking clean and realistic.
Perspective correction during editing can help refine alignment further, but proper in-camera framing saves enormous editing time later.
Use Waist-Height Camera Placement
Camera height affects room balance more than many beginners realize.
I normally position my tripod around chest-to-waist height because it creates a natural visual ratio between floors, furniture, countertops, and ceilings.
Shooting too high causes ceilings to dominate the image, while shooting too low distorts furniture proportions.
The Three-Wall Rule Creates Better Depth
One of my favorite interior composition techniques involves framing three connected walls within the shot whenever possible.
This approach creates stronger depth perception and helps viewers understand room flow more naturally. It also prevents flat-looking compositions that feel visually cramped online.
Lighting Techniques That Make Listing Photos Feel Brighter
Lighting quality often determines whether a property feels luxurious or ordinary.
Understanding advanced real estate photography lighting techniques can dramatically improve exposure balance, window detail, and the overall atmosphere of interior listing photos.
Use Natural Window Light Whenever Possible
Natural light creates the cleanest and most believable atmosphere.
I usually open all blinds and window coverings before shooting to flood interiors with ambient daylight and reveal outdoor views whenever possible.
Overcast days actually work extremely well because clouds soften harsh sunlight and reduce distracting shadows across walls and floors.
Turn On Every Interior Light
I switch on every single overhead fixture, lamp, vanity light, and accent light before photographing interiors.
Warm interior lighting helps rooms feel welcoming and balanced, especially during twilight shoots or cloudy weather conditions.
I also make sure ceiling fans remain completely off because moving blades create distracting motion blur during long exposures.
The Staging Workflow I Follow Before Every Shoot
Preparation matters just as much as camera technique.
Even advanced editing software cannot fully fix cluttered spaces or poor organization.
Before shooting any property, I carefully simplify the environment to remove distractions from the frame.
Kitchen counters should remain mostly clear except for tasteful decor. Bathrooms should have closed toilet lids, clean mirrors, and neatly folded towels. Driveways should remain free from trash bins and parked vehicles whenever possible.
I also smooth bed sheets, fluff pillows, align furniture carefully, and remove distracting cords or personal items throughout the property.
These small adjustments dramatically improve perceived property value online.
Exterior Photography Tips That Increase Click-Through Rates
The exterior hero image often becomes the deciding factor for whether buyers explore a listing further.
That first impression matters enormously.
Best Time of Day for Exterior Photos
Golden hour consistently creates the most attractive exterior lighting.
I usually schedule front facade photography during early morning or late afternoon when sunlight becomes warmer and shadows soften naturally.
East-facing homes photograph best during morning light, while west-facing properties usually look strongest later in the day.
Tracking sun orientation before a shoot significantly improves exterior consistency.
Why Overcast Conditions Can Actually Help
Many beginners avoid cloudy weather, but slightly overcast skies often improve real estate photography.
Cloud cover acts like a giant natural diffuser that softens shadows and balances exposure across the property exterior.
This creates cleaner siding detail, softer landscaping contrast, and more evenly lit facades.
Editing Techniques That Keep Listing Photos Realistic
One of the biggest mistakes I see in the industry is overediting.
Aggressive HDR effects, excessive saturation, unrealistic sky replacements, and distorted vertical corrections often damage buyer trust.
Professional editing should enhance a property naturally rather than completely transform it.
I usually focus on balanced exposure, clean white balance, realistic shadow recovery, and subtle perspective correction.
Consistency across the full gallery matters tremendously because it makes listings feel polished and professionally branded.
Once I stopped chasing dramatic editing styles and focused more on realism, my images immediately started performing better online.
And honestly, mastering these real estate photography tips completely changed how I approach property marketing today.
FAQs About Real Estate Photography
1.What lens is best for real estate photography?
Wide-angle lenses between 14mm and 17mm on full-frame cameras usually provide the best balance between coverage and realistic room proportions.
2.What camera settings work best for interior real estate photos?
Most photographers shoot around f/8 with ISO 100 and use exposure bracketing to balance windows and darker interior spaces.
3.Why do professional real estate photos look brighter?
Professionals combine natural lighting, HDR blending, careful staging, and proper editing to create balanced and inviting interiors.
4.Is HDR necessary for real estate photography?
HDR is extremely useful because it preserves details inside both bright windows and darker room corners simultaneously.
5.What time should you shoot exterior listing photos?
Golden hour during early morning or late afternoon usually creates the softest and most attractive exterior lighting.
Turning Great Photos Into Faster Home Sales
Great real estate photography is not just about sharp images or expensive gear. It is about creating a strong first impression that makes buyers stop scrolling and explore the listing further.
Clean staging, balanced lighting, straight vertical lines, natural HDR real estate photography blending, and thoughtful composition all work together to make homes feel brighter, larger, and more inviting online.
Once I started following a consistent workflow instead of guessing during shoots, my results improved dramatically. In today’s competitive housing market, professional listing photos can directly influence buyer interest, showing requests, and how valuable a property feels from the very first click.


